
What is SkudoCloud?
SkudoCloud is a cloud-based platform that allows clients to deploy dedicated load balancers across a global infrastructure. Clients can reserve specific computing resources (CPU, RAM, disk, bandwidth, etc.) that are exclusively used by their load balancers. This ensures performance, isolation, and reliability.
How SkudoCloud Technology is Deployed
SkudoCloud lets customers create load balancers in over 10 data centres across the USA, Europe, Asia, and Australia, such as New York, San Francisco, London, Frankfurt, Singapore, and others.
Each load balancer (LB) created is assigned dedicated resources, meaning:
- They are not shared with other clients.
- You are guaranteed consistent performance.
You can use these resources however you want.
What Dedicated Resources Are Assigned to Each Load Balancer?
1. Dedicated RAM
- Used to handle traffic, maintain configurations, store TCP/UDP sessions, session persistence, and run background threads.
- More RAM equals a more stable system under high traffic or complex protection configurations.
2. Dedicated CPUs (vCPUs)
- Based on Intel CPUs, optimised for processing network data.
- Used for traffic analysis and applying load balancing algorithms.
- Higher concurrency or more security rules require more CPUs.
3. Dedicated Public IP
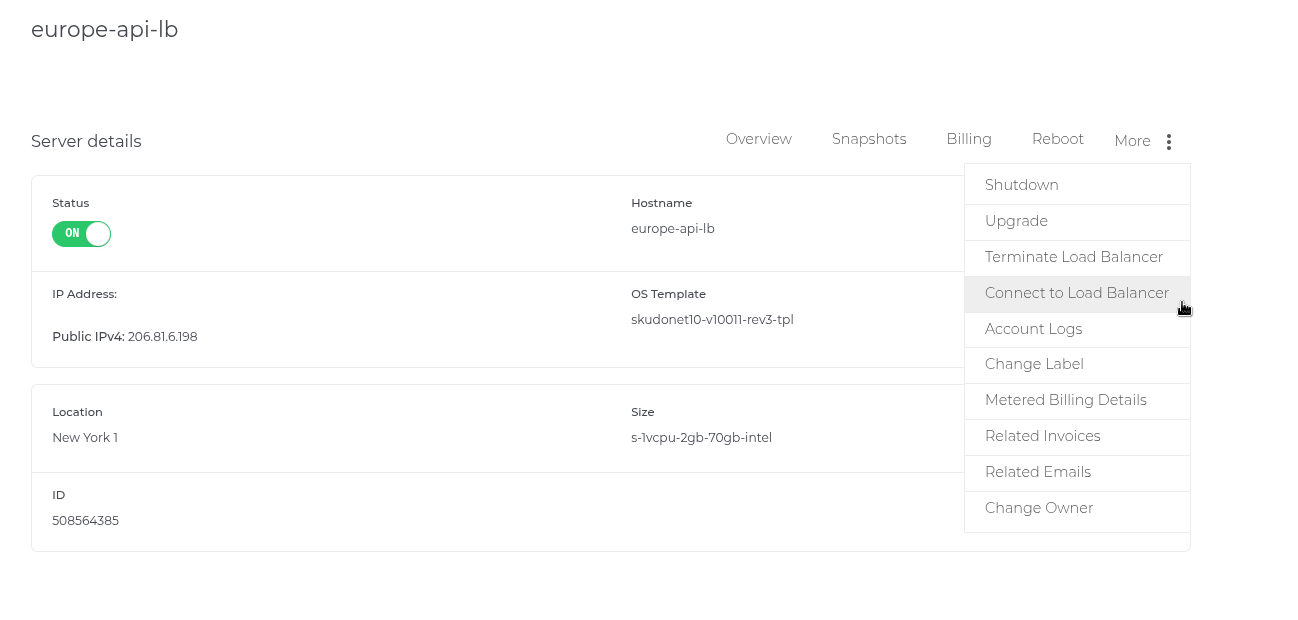
- Each load balancer is assigned a fixed public IP address that remains unchanged throughout its lifetime.
- If the load balancer is destroyed, the IP is returned to the available pool.
4. Defined Outgoing Traffic Volume
- Each plan includes a monthly quota for outgoing traffic.
- Extra usage is charged at €0.04 per additional GB.
5. Snapshots
- Snapshots can be taken at any time (even while the system is running), for backup or rollback purposes.
- Rolling back to a snapshot results in a brief downtime (5–30 seconds).
6. Maximum Storage Size
- SSD storage is used for fast, high-concurrency writing (e.g., log files).
- Log retention = 7 days. More logs = more disk usage.
7. Max Number of Load Balancing Farms
- A “farm” is a set of backend servers managed by the LB.
- Each plan limits how many farms you can set up.
Available Plans
Datacenter Locations
- North America: New York, San Francisco, Toronto
- Europe: London, Amsterdam, Frankfurt
- Asia-Pacific: Singapore, Sydney
Billing Rules
- As soon as you create a resource, it is charged to your billing system.
- If you stop the load balancer (but don’t delete it), it will still use the assigned resources so that charges will continue.
- Billing stops only when the resource is destroyed.
Step-by-Step: How to Create a Load Balancer in SkudoCloud
This guide walks you through the process of creating a load balancer in SkudoCloud, with annotated screenshot placeholders to assist you visually.
Step 1: Access the Load Balancer Creation Page
From the left-side menu, click on “New Load Balancer.”
Step 2: Select the Product Plan
Choose the load balancer plan that fits your technical and traffic requirements. Plans vary in CPU, RAM, bandwidth, and included features like WAF or DDoS protection.
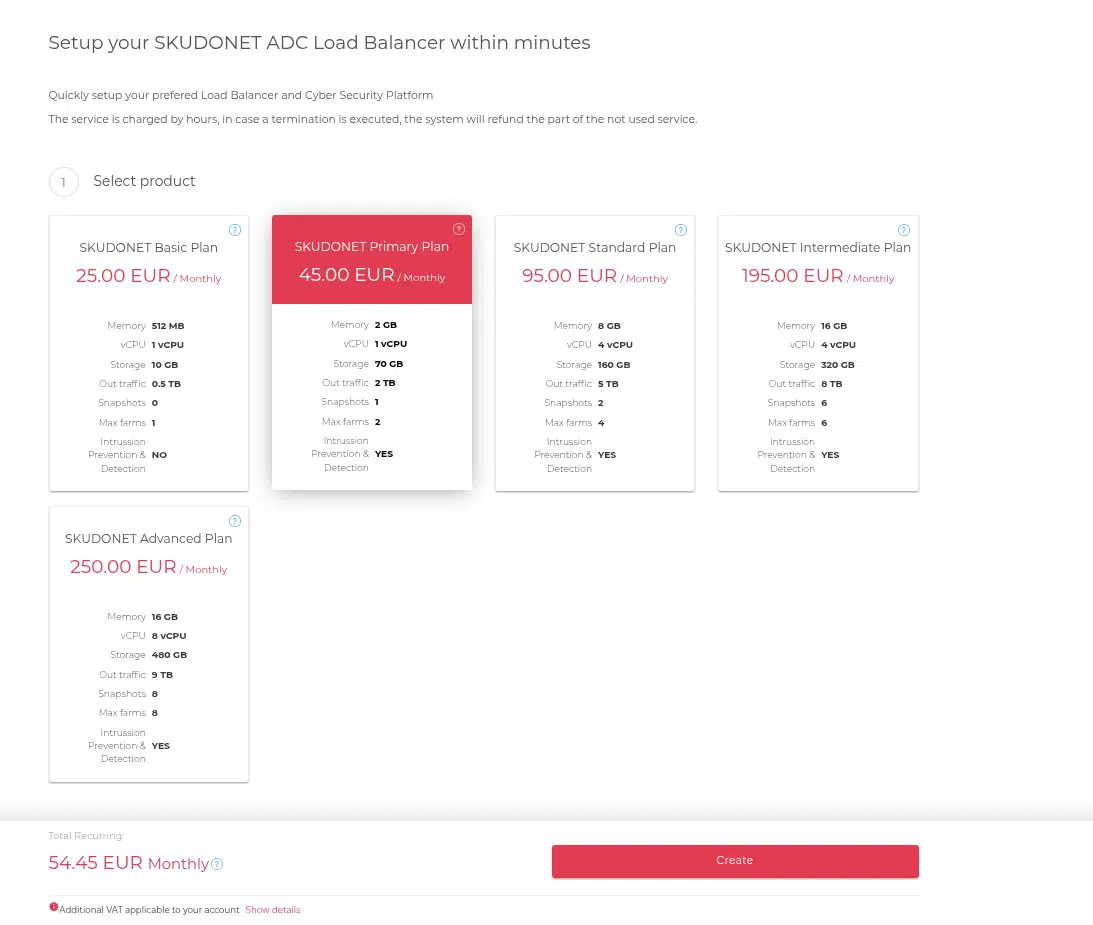
💡 Tip: Hover over each plan to see details and comparisons before selecting.
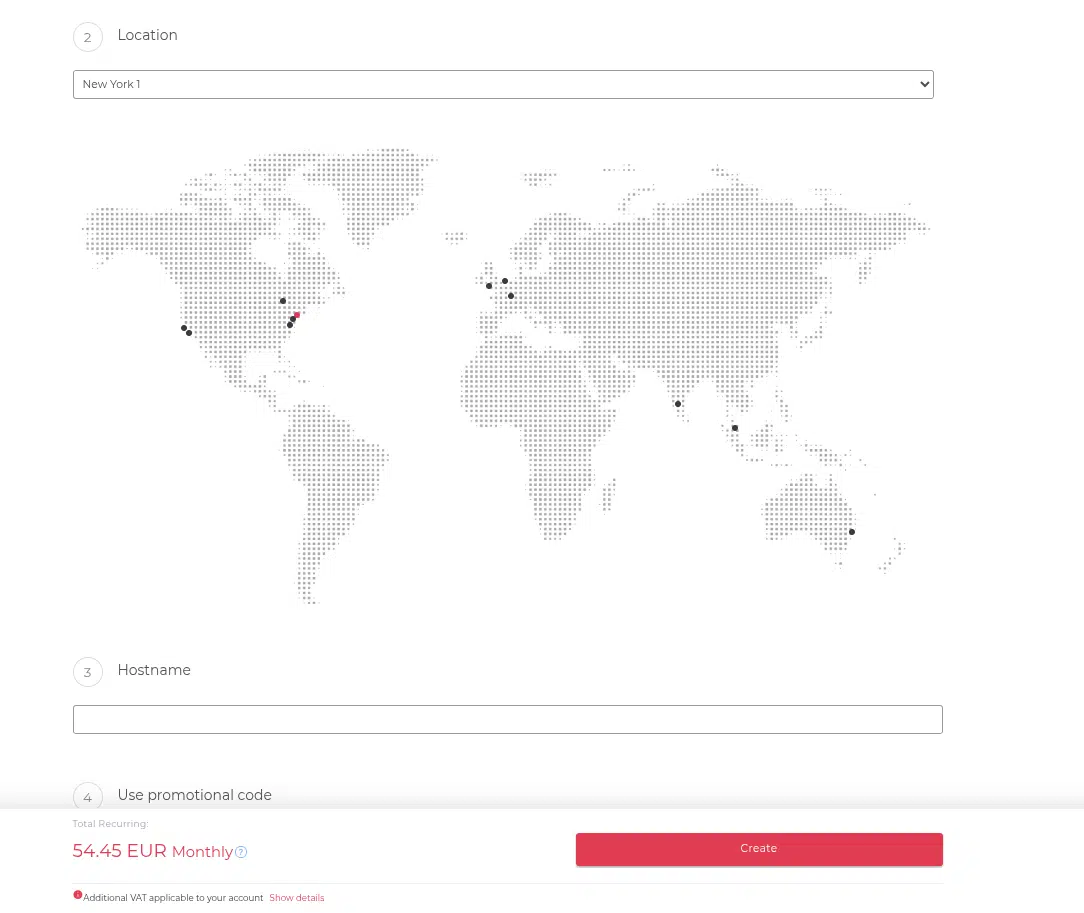
Step 3: Choose the Deployment Datacenter
Select the datacenter location closest to your users or backend infrastructure.
This is where your load balancer will be physically provisioned, and a dedicated public IP will be assigned.
Step 4: Assign a Hostname
Input a descriptive hostname for your load balancer.
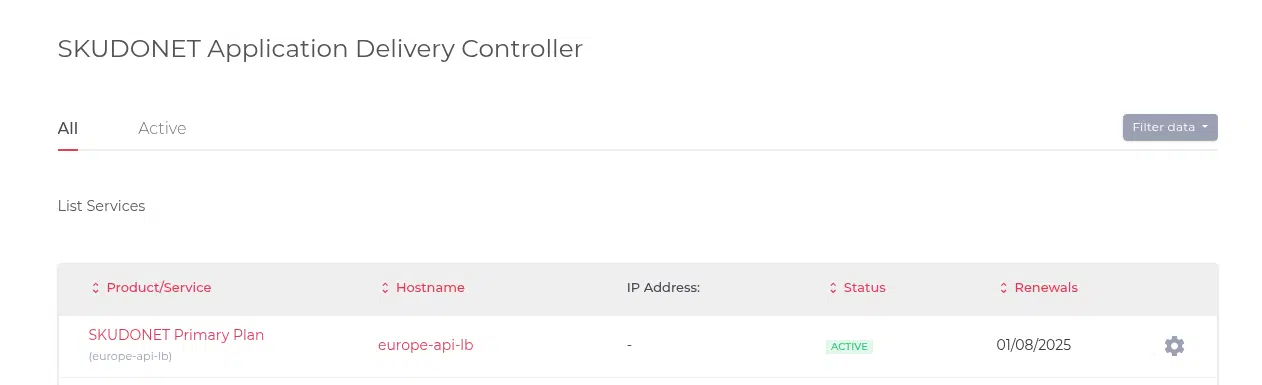
This identifier cannot be changed later, so choose something clear (e.g., europe-api-lb or prod-web-lb).
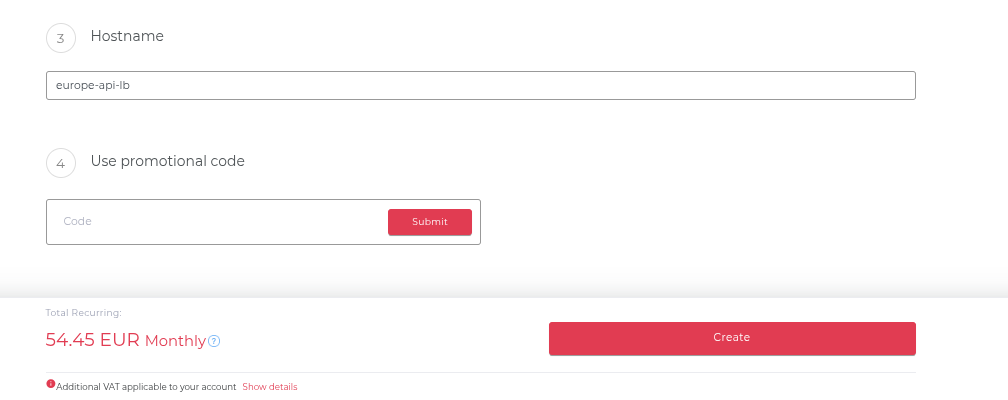
Step 5: (Optional) Enter Promo Code
If you have a promotional or discount code, enter it here to apply it before checkout.
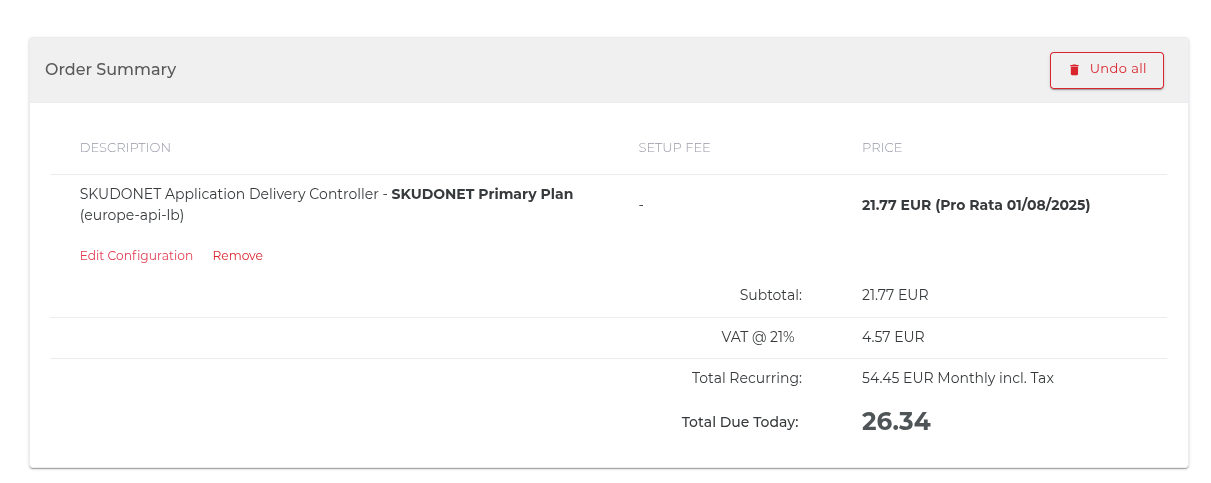
Step 6: Review Pricing Summary
Before creating the resource, you’ll see a cost breakdown:
- Current month (Pro Rata) billing
- Any taxes
- The “Total Recurring” monthly charge moving forward
Step 7: Select Payment Method
Select your preferred payment method (e.g., credit card) and, optionally, fill in the “Additional Information” field — this is for internal use only and doesn’t affect the deployment.
Step 8: Finalise and Deploy
Click “Checkout” to complete the creation process.
If the payment is successful:
- Resources (CPU, RAM, bandwidth) are reserved
- A public IP is assigned
- The load balancer appears as ACTIVE in your dashboard
Step 9: Begin Configuration
Once deployed, click into your load balancer to begin:
- Adding backend farms
- Setting SSL certificates
- Enabling WAF, rate limiting, or traffic rules
Your Load Balancer Is Live
You can now:
- Route traffic to backend services using the Public assigned IP.
- Secure endpoints using Botnets, Realtime blocklists, DDos and WAF protection.
- Monitor logs and fine-tune rules.
