Contents
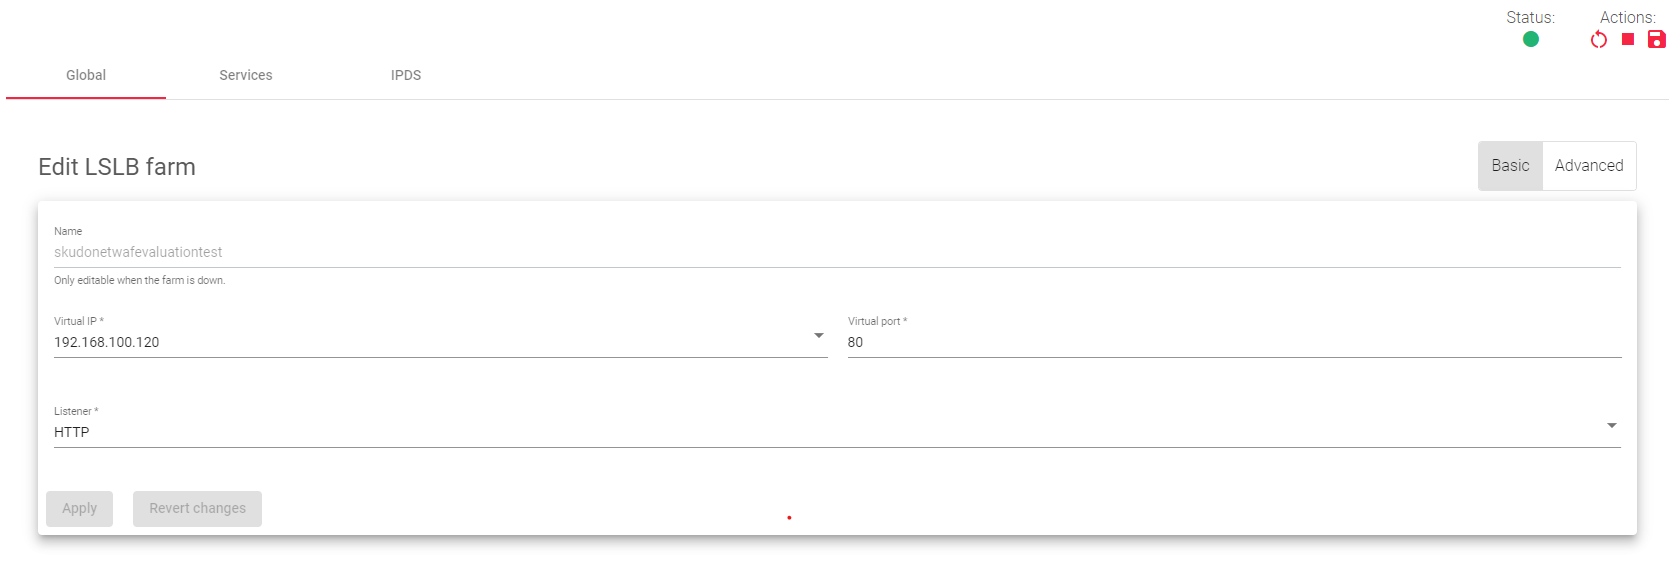
Global Settings for HTTP Farm Profile
The HTTP profile is a load-balancing profile that intelligently distributes incoming web traffic across multiple backend servers based on the content of incoming requests. This can be useful for improving performance and reliability, and for offloading specific tasks to specific servers.
The top right section of the HTTP farm profile page contains four Action buttons:
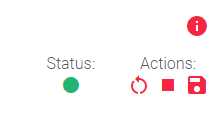
- Restart: Refresh button Restarts the LSLB farm.
- Start: Triangle button Starts the LSLB farm if it is stopped or inactive.
- Stop: Square button Stops the LSLB farm.
- Apply: Save button Saves changes modified on a specific farm.
LSLB Farm Status Colors
The following colors represent the status of a given farm:
 Green: The farm is running and all of the backends are available.
 Red: The farm is stopped or unavailable.
 Black: The farm is running, but none of the backends are available.
 Blue: The farm is running, but at least one backend is unavailable.
 Orange: The farm is running, but at least one backend is in maintenance mode.
Basic Parameters for HTTP/S Farm Profile With Global Settings
Name: A unique name for the farm.
Virtual IP: The IP address that the farm will listen for incoming connections on.
Virtual Port: The port that the farm will listen for incoming connections on.
Listener: The layer 7 protocol that the farm will use to perform content switching (HTTP or HTTPS).
- HTTP: The farm will only handle plain HTTP traffic.
- HTTPS: The farm will handle Secure HTTP traffic and perform SSL offloading, which will relieve the real application servers from the overhead of handling SSL connections.
The HTTP(S) farm profile allows one to configure a load balancer to handle both HTTP and HTTPS traffic from a single IP address and port. This can be useful for simplifying your network architecture and improving performance.
HTTP(S) Farm Profiles
The HTTP header X-Forwarded-For is populated with the client IP address by default in HTTP(S) farm profiles.

Like a reverse proxy, an HTTP(S) farm can manage multiple services. This means that one HTTP virtual IP and port pair can handle multiple load-balanced web services. To support this, HTTP farms have a section called Service that provides virtual host flexibility and allows you to create lists of backends for each service.
Each HTTP(S) service uses regular expressions (for the Virtual host and URL pattern) in PCRE (perl common regular expression) to match specific patterns in the HTTP headers of inbound connections (HTTP Requests). If the pattern matches in both the virtual host and URL pattern field, the backends on that particular service will process those inbound connections.
In simple terms, the HTTP(S) farm profile allows you to configure how the load balancer handles HTTP and HTTPS traffic. You can use the service section to configure the load balancer to handle multiple web services from a single IP address and Port.
HTTPS Parameters
The Appliance supports the following SSL/TLS versions.

SSL/TLS Versions
- Disable SSLV2
- Disable SSLV3
- Disable TLSV1
- Disable TLSV1.1
- Disable TLSV1.2
Ciphers

All: The farm will use all available cipher suites. This is the default setting.
High security: The farm will use the following ciphers:
- kEECDH+ECDSA+AES128
- kEECDH+ECDSA+AES256
- kEECDH+AES128
- kEECDH+AES256
- kEDH+AES128
- kEDH+AES256
- DES-CBC3-SHA:+SHA:!aNULL:!eNULL:!LOW:!kECDH:!DSS:!MD5:!EXP:!PSK:!SRP:!CAMELLIA:!SEED
Custom security: You can customize specific ciphers to allow or forbid when making an SSL connection. The format must be the same as in OpenSSL ciphers.
SSL Certificates
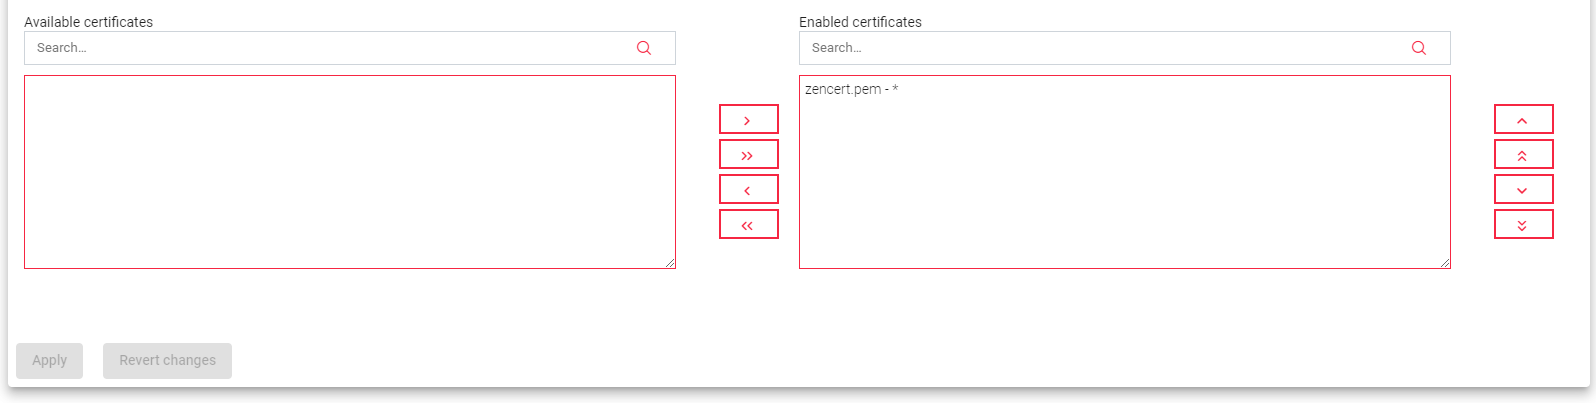
Available certificates: These are the available SSL certificates installed on the device. To enable a certificate, either select it and click the arrow button or drag and drop it from the Available box to the Enabled box.
Enabled certificates: These are the certificates that are currently in use by the farm. You can move them to the top or bottom or disable all of them. The order of the certificates is important. If you configure a wildcard certificate before a host certificate, the wildcard will be used first.
Explanation
SSL/TLS versions and ciphers are used to encrypt data transmitted between the client and the server. Disabling any of the SSL/TLS versions or ciphers may reduce security, so it is not recommended unless absolutely necessary.
The High security cipher suite is recommended for most use cases. It provides strong security and is compatible with a wide range of browsers and devices.
If you need to customize the ciphers used by the farm, you can do so in the Custom security section. However, it is important to note that this can reduce security if you are not careful.
Certificates are used to identify the server to the client. You must enable at least one certificate for the farm to use.
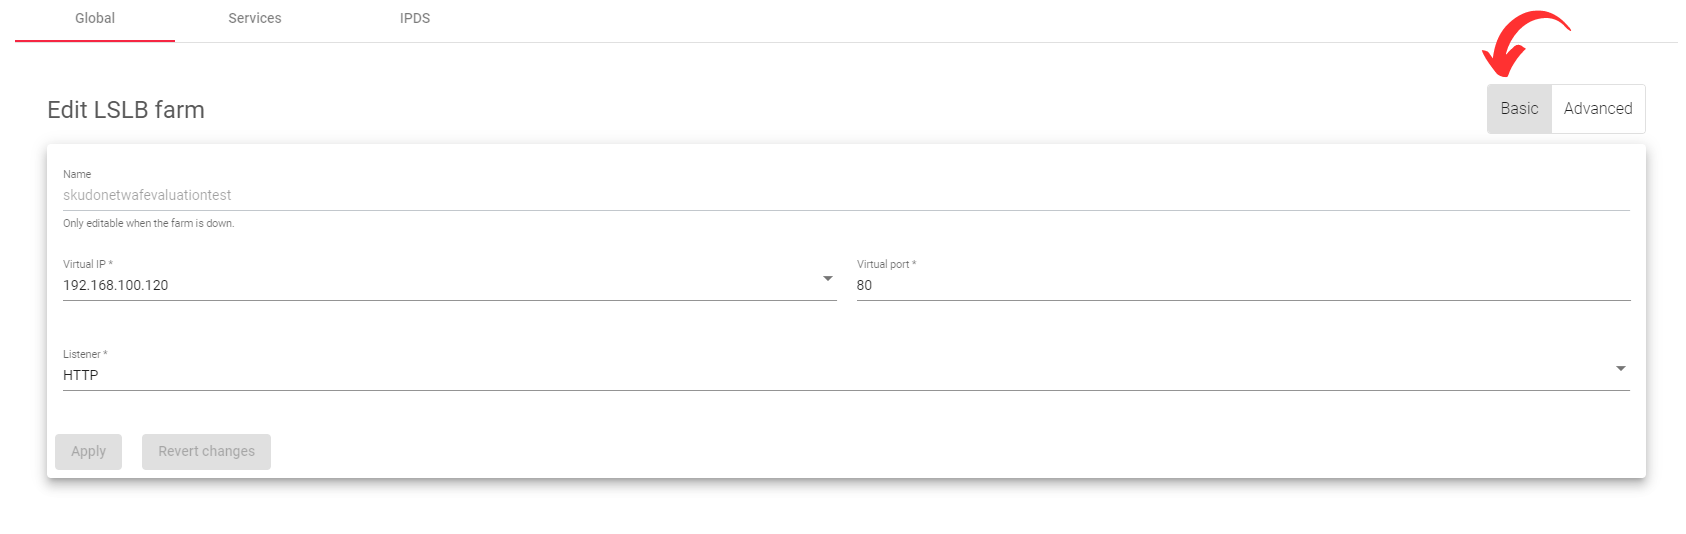
Advanced settings
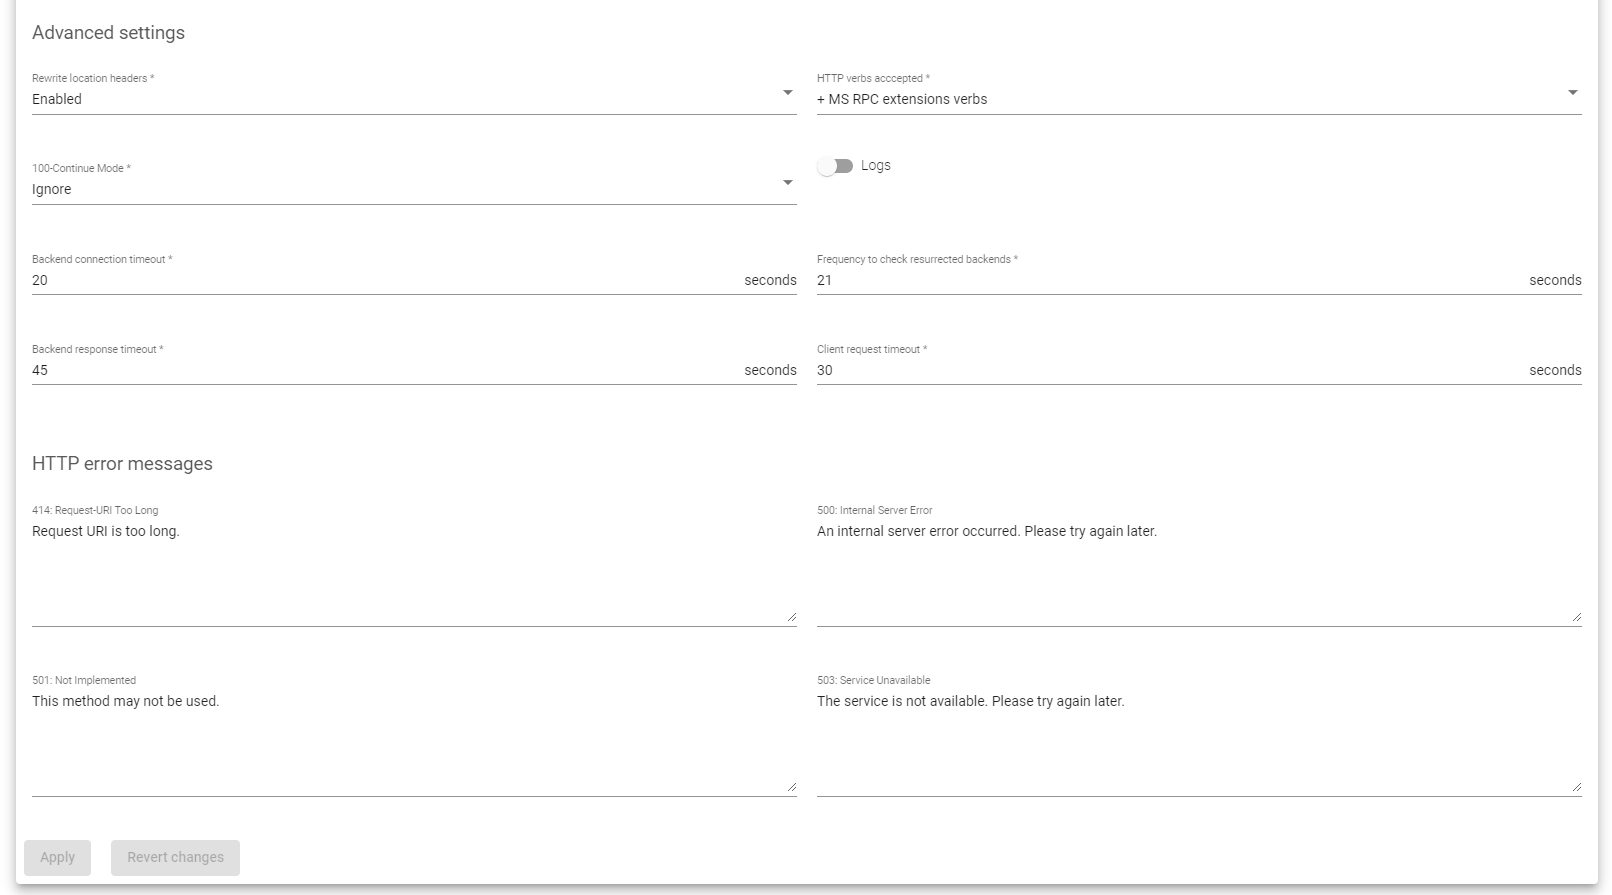
Rewrite location headers
If enabled, the farm will modify the Location and Content-location headers in response to the client. If they have the value of the backend itself or the VIP but with a different protocol, the response will be modified to show the virtual host in the request.
HTTP verbs accepted
This field indicates the HTTP methods that will be used to validate HTTP client requests. If the client’s request is not allowed, an error will be shown to the client.
- Standard HTTP verbs: GET, POST, HEAD
- Extended HTTP verbs: Added to the previous list the verbs PUT, PATCH, DELETE
- Options HTTP verbs: Added to the previous list the verbs OPTIONS
- Standard WebDAV verbs: Added to the previous list the verbs LOCK, UNLOCK, PROPFIND, PROPPATCH, SEARCH, MKCOL, MKCALENDAR, MOVE, COPY, TRACE, MKACTIVITY, CHECKOUT, MERGE, REPORT
- MS extensions WebDAV verbs: Added to the previous list the verbs SUBSCRIBE, UNSUBSCRIBE, NOTIFY, BPROPFIND, BPROPPATCH, POLL, BMOVE, BCOPY, BDELETE, CONNECT
- MS RPC extensions verbs: Added to the previous list the verbs RPC_IN_DATA, RPC_OUT_DATA,VERSION-CONTROL
Ignore 100 Continue
Whenever clients upload files to a server, we expect flawless transactions. Developers may have configured a web application to upload files with specific file extensions and possibly a particular content length. What if the application servers receive files with unexpected content lengths or File types? Then the backend servers should reject them. Right? The files could also have malicious payloads in them, unsupported, or just too large.
Depending on the needs of your application, we may configure SKUDONET ADC to handle these client requests on behalf of your application servers, particularly for requests that involve receiving data from the client to the server. This way, we could delegate server resources to other tasks or explicitly check request contents if we must.
The SKUDONET load balancer implements the 100-Continue mechanism, a feature that controls how file uploads are received by the backend servers.

The load balancer could reject or forward a request to a backend server for further inspection of the files, depending on the Mode you choose. There are four modes for implementing this feature. These include:
- Pass
- Silent Pass
- Ignore
- Not Allow
A detailed explanation of the 100-Continue Mode in SKUDONET ADC can be found in the article: Expect: 100 Continue in Modern Proxies
Logs
Enable or disable farm traffic logs to debug and analyze what is passing through the load balancer.
Backend connection timeout
This value indicates the time the farm will have to wait for a connection to the backend in seconds. Usually, it will be the socket opening wait time. By default, this value is set to 20 seconds.
Frequency to check resurrected backends
This is how often the load balancer will wait to check if a backend is reachable and to get out a blacklisted real server if it is up. The farm will be checking the backend periodically once the real server is marked as down, regardless of whether there is a new client connection or not. By default, this value is set to 21 seconds.
Backend response timeout
This value indicates the time the farm will have to wait for a response from the backends in seconds. By default, this value is set to 45 seconds.
Client request timeout
This value indicates the time the farm will have to wait for a client’s request. Once this timeout is reached without getting any data from the client, the connection will be terminated. By default, this value is set to 30 seconds.
HTTP error messages

Personalized error messages: Your farm service displays a custom message on your website when a web code error is detected from the real servers. This means that you can show a personalized HTML page for error codes 414, 500, 501, and 503.
Here is a brief explanation of each error code:
- 414: Request-URI Too Long: This error message is displayed by the HTTP(S) profile if the URI reaches the maximum number of characters allowed. To fix this error, shorten the length of the URL.
- 500: Internal Server Error: This error message is displayed by the HTTP(S) profile if the backend encounters an unexpected command. This can be caused by a variety of factors, such as a bug in the backend code or a problem with the server configuration.
- 501: Not Implemented: This error message is displayed by the HTTP(S) profile if the request verb is not managed or known by the proxy or backend. This can happen if you are trying to use a new HTTP verb that is not yet supported.
- 503: Service Unavailable: This error message is displayed by the HTTP(S) profile if the proxy does not find an available backend for the request. This can happen when all backends or servers are down, or because the regular expression in the request does not match with any configured service.
When you personalize your error messages, you provide your users with a more informative and helpful experience.
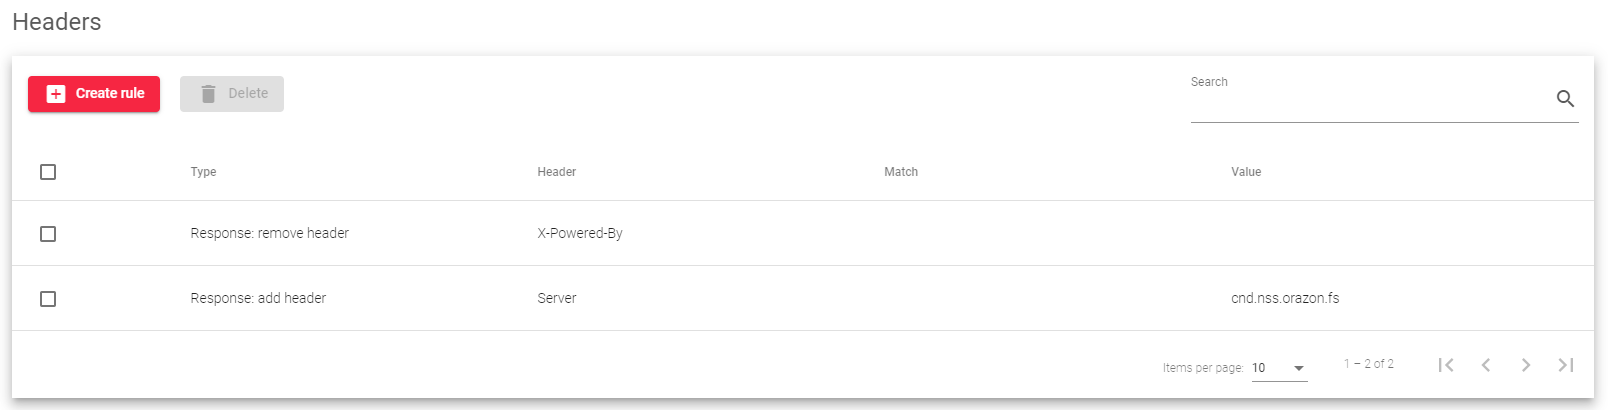
Headers
In the Global Header Rules section, you can Add, Modify, or Delete request and response headers for all configured services. If a header is already configured in the service section, the global header rule will be ignored.
Create Rule: Creates a new global header rule.
Delete: A global header rule will be deleted.
The following are the global rules on the load balancer.
Header Type:
Request: remove header: This rule will remove a specific header from the client HTTP requests.
Request: add header: This rule will add a new header to the client HTTP requests.
Response: remove header: This rule will remove a specific header from the backend HTTP response.
Response: add header: This rule will add a new header to the backend HTTP response.
Once you have created a global header rule, you can edit or delete it at any time.
Here is an example of how you might use global header rules:
- To remove the X-Powered-By header from all responses, you could create a Response: remove header rule with the following pattern: X-Powered-By.
- To add a Strict-Transport-Security header to all responses, you could create a Response: add header rule with the following pattern: Strict-Transport-Security: max-age=31536000; includeSubDomains
Services Settings
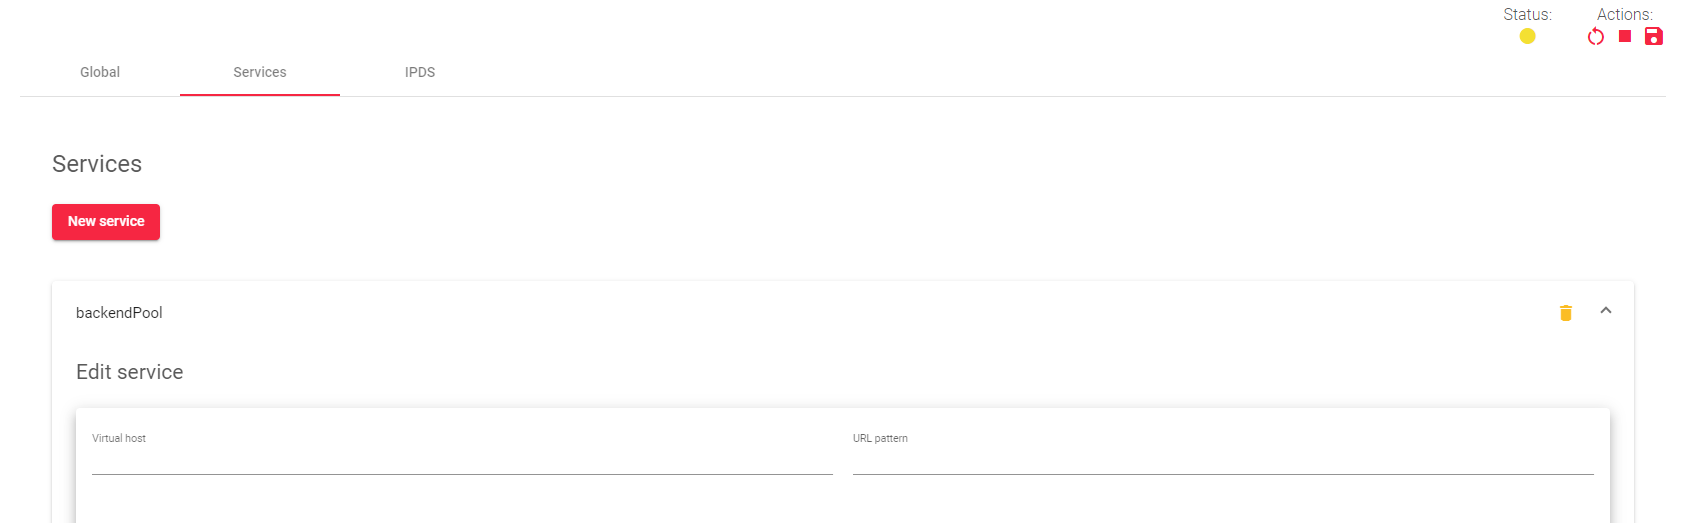
LSLB farm services with an HTTP profile allow you to deliver multiple web services and applications through a single virtual IP and port. This is useful for unifying web applications through a single domain, managing virtual hosts, managing URLs, configuring redirects, configuring persistence, and assigning backends to specific services.
Each service within an LSLB farm has its own properties, health checks, persistence, header management, and backend list. You can use regular expressions to match conditions that will specify the service to be used per request.
The HTTP farm profile core will check each service match condition in priority mode (you can change the priority if needed). If no service is matched, the farm core will return an error (HTTP error 503). So, it is important to have specific multiple-service definitions configured. If the URL and Host fields are not defined, all requests will match.
Matching HTTP Service conditions
You can Match conditions so as to route traffic to specific HTTP services. The most common matched conditions are:
Virtual host: This condition matches the domain name of the request to a specific service. For example, you could create a match condition that routes all traffic to the domain mail.example.com or api.example.com to the service example-service.
URL pattern: This condition matches the URL path of the request to a specific service. For example, you could create a match condition that routes all traffic to the URL path /api/v1/products to the service products-service.
Virtual Host and URL pattern: You can use regular expressions to match incoming requests to a specific service. Both fields must match for the request to be routed to this service.
Redirect
When the redirect option is enabled, the service will forward all requests to the specified URL without using the backend servers.

Redirect Type: There are two ways to redirect clients to a different URL. The first way, called the Default type, redirects the client to the exact URL that you specify. The second way, called the Append type, adds the original request path to the end of the URL that you specify.
Redirect URL: This parameter specifies the URL to which clients will be redirected. If you configure a redirect URL, you should not also configure backends for this service. Instead, the appliance will send an HTTP Location Header response to the client, redirecting it to the configured URL.
Redirect Code: There are three different HTTP redirect codes that you can use:
- 301 (Moved Permanently): This code indicates that the resource has been permanently moved to a new location. Clients should update their bookmarks and links accordingly.
- 302 (Moved Temporarily): This code indicates that the resource has been temporarily moved to a new location. Clients should continue using the original URL in the future, as the resource may be moved back at any time.
- 307 (Temporary Redirect): This code is similar to the 302 code, but it explicitly states that the original request method (GET, POST, etc.) should be used when requesting the new URL.
Persistence
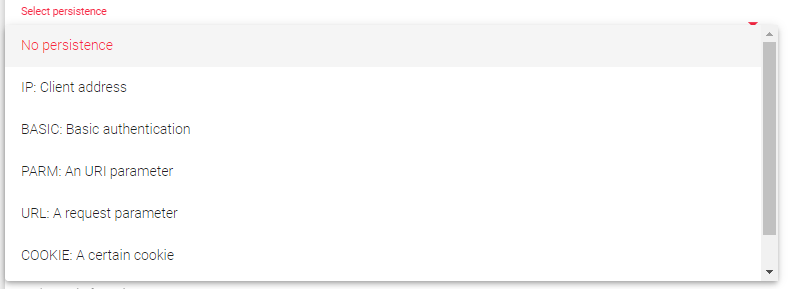
Persistence: This setting controls how the HTTP service manages client sessions and which HTTP connections are used to maintain secure client sessions. When you select a persistence session type, you will be shown its Time To Live (TTL) in seconds.
No persistence: The farm service will not control client sessions. HTTP or HTTPS requests will be delivered to real servers in a round-robin fashion.
IP Client address: The client IP address will be used to keep client sessions open through the real servers.
BASIC: Basic authentication: The HTTP basic authentication header will be used to control client sessions. For example, when a web page requests basic authentication from the client, an HTTP header will contain a string like the following:
HTTP/1.1 401 Authorization Required
Server: HTTPd/1.0
Date: Sat, 27 Nov 2011 10:18:15 GMT
WWW-Authenticate: Basic realm="Secure Area"
Content-Type: text/HTML
Content-Length: 31
Then the client answers with the header:
GET /private/index.html HTTP/1.1
Host: localhost
Authorization: Basic QWxhZGRpbjpvcGVuIHNlc2FtZQ==
This basic authentication string is used as an ID for the session to identify the client session.
PARM: A URI parameter. Another way to identify a client session is through a URI parameter separated from a semicolon character that is used as a user session identifier. In the example http://www.example.com/private.php;EFD4Y7, the parameter will be used as the session identifier.
URL: A request parameter. When the session ID is sent through a GET parameter with the URL, this parameter indicates that the name associated with the client session ID will be possible. For example, a client request like http://www.example.com/index.php?sid=3a5ebc944f41daa6f849f730f1 should be configured with the parameter Persistence Session Identifier (sid value in this example) and the persistence session time to life (TTL).
COOKIE: You can select an HTTP cookie variable to read from the HTTP headers and use it to maintain client sessions for a given time. The cookie name configured in the persistence session identifier field is created by a programmer and embedded in a webpage to identify the client session. For example:
GET /spec.html HTTP/1.1
Host: www.example.org
Cookie: sessionidexample=75HRSd4356SDBfrte
You must also configure the persistence session time to life (TTL). This value controls the amount of time that the load balancer keeps track of a client session after there has been no activity between the client and the backend server.
HEADER: A header is a custom field that can be added to an HTTP request. This field can be used to identify the client session. The persistence session time to live (TTL) and persistence session identifier must be configured for this type of persistence.
For example, the following request header could be used to identify a client session:
X-sess: 75HRSd4356SDBfrte
This header could be used by a load balancer to route all requests from the same client to the same backend server, ensuring that the client session is maintained.
Cookie
Cookie insert: If you enable cookie insert, the load balancer will create a cookie in each response with the appropriate key of the backend server. This means that even if the session table is flushed or sessions are disabled, the load balancer will still be able to route the client to the correct backend server. This feature is useful because it avoids having to change the code of the real servers to create a session cookie.

Cookie Name: The name of the cookie that will be created and added to the client request and backend response.
Cookie Path: The URI or relative path where the new cookie will be created. For the whole domain, the character ‘/’ needs to be set.
Cookie Domain: The domain where the cookie will be created.
Cookie TTL: The number of seconds that the cookie will be kept in memory between the client and backend. This field must be greater than 0. After the specified number of seconds without activity, the persistence session will be deleted.
Farmguardian
HTTP farms have a basic built-in backend health check, but for more sophisticated health checks, Farmguardian is recommended. Farmguardian can perform advanced health checks to ensure that the application is healthy, and it can be configured to use built-in or customized health checks.
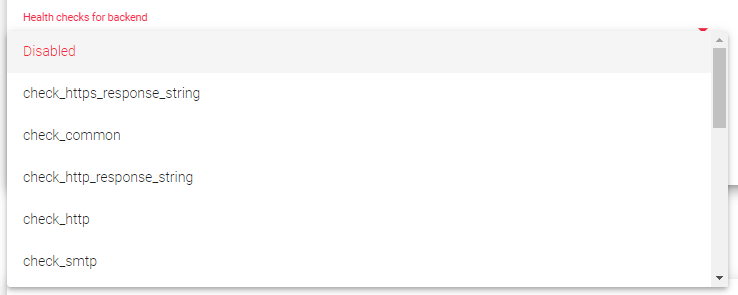
For more information about Farmguardian, see the Monitoring >> Farmguardian section. Once you have selected a Farmguardian configuration, it will be automatically applied to the farm.
HTTPS Backends: Check this box to indicate to the farm that the backend servers defined in the current service are using the HTTPS protocol. This will ensure that the data is encrypted before being sent.
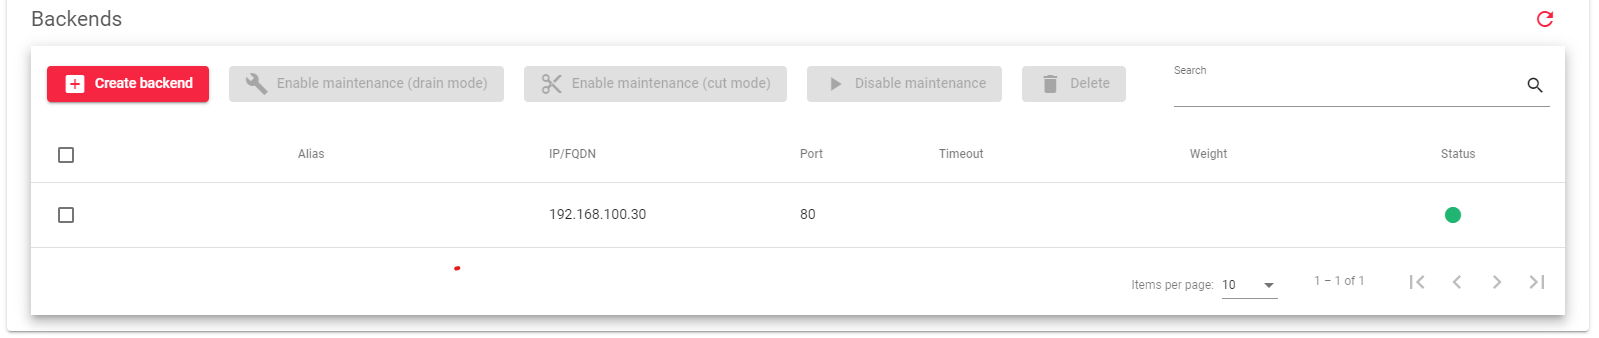
Backends
All backends in an HTTP farm must be either IPv4 or IPv6, and they must use the same IP version as the farm VIP.
There are a number of Actions that can be performed on backends, including:

For already created backends:
Create backend: This action opens the backend creation form.
Enable Maintenance: This action prevents new connections from being sent to the backend. There are two ways to enable maintenance mode:
- Drain Mode: This mode keeps existing connections and persistence active, but does not allow new connections.
- Cut Mode: This mode immediately drops all active connections to the backend.
Disable Maintenance: This action allows new connections to be sent to the backend again.
Delete: This action removes the configuration for the selected backend.
For new backends:
In addition to the actions listed above, the following backend properties can be configured:
- Alias: An alias for the backend, if any.
- IP: The IP address of the backend.
- Port: The port number of the backend.
- Timeout: The amount of time that the backend has to respond to a request. This value overrides the global backend connection timeout parameter, but is limited to the selected farm.
- Weight: The weight of the backend. A higher weight means that more connections will be sent to the backend. The default weight is 1. The weight value can range from 1 to 9.
IPDS Rules for HTTP farms
This section allows you to enable IPDS rules. IPDS stands for Intrusion Prevention and Detection System. It is a security system that protects your network from attacks.
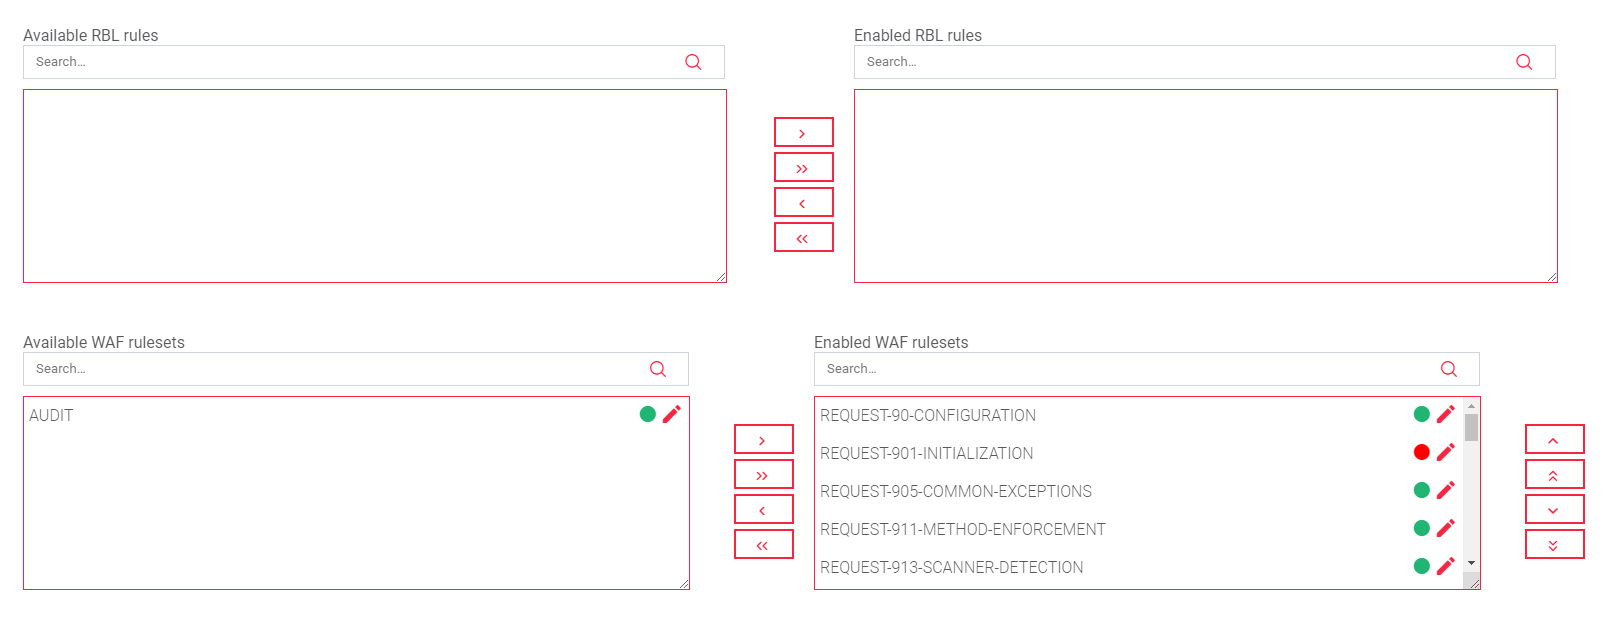
There are four types of IPDS rules:
- Blacklist: Rules that block traffic from known malicious IP addresses.
- DoS: Rules that protect against denial-of-service attacks.
- WAF: Rules that protect against web application attacks.
- RBL: Rules that block traffic from known malicious domains.
For each type of IPDS rule, there are two tables:
Available: This table shows all of the IPDS rules of that type that are available to you.
Enabled: This table shows all of the IPDS rules of that type that are currently enabled for the selected farm.
To add an IPDS rule to a farm:
- Select the desired rule from the Available table.
- Click the forward arrow.
To delete an IPDS rule from a farm:
- Select the desired rule from the Enabled table.
- Click the back arrow.
You can also add or remove all of the IPDS rules of a certain type at once by clicking the right or left double arrows.
To edit an IPDS rule:
- Click the Edit icon next to the rule.
You cannot create new IPDS rules from the farm view. To create a new IPDS rule, you must go to the IPDS section.
Next Article: LSLB | Stats
